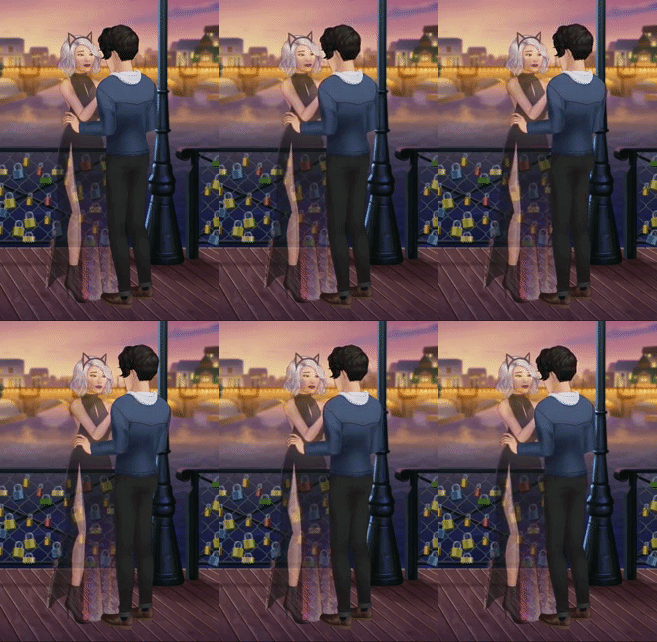
It's not yet possible to change the opacity of a character in the same way as changing the opacity of an overlay, BUT there is a trick to make is appear as though your character is fading in/out.
THE TRICK:
Upload the background image as an overlay, set it at a higher layer than your character(s), then change the opacity of the overlay.
You can use any photo editing app/site to convert the background image to a PNG image.
"Ghost" Like Characters
-
DARA is placed at layer 1 and BOYFRIEND is placed at layer 3.
-
The background overlay is set at layer 2 so that it's between DARA and BOYFRIEND.
-
To make DARA see through, I changed the opacity of the overlay to 0.5
EXT. SEINE RIVER - NIGHT
@cut to zone 3
@DARA moves to layer 1 and BOYFRIEND moves to layer 3
@overlay RIVER_ZONE_3 create
@overlay RIVER_ZONE_3 to layer 2
@overlay RIVER_ZONE_3 opacity 0.5 in 0

Fading OUT Characters
-
DARA is placed at layer 1 and BOYFRIEND is placed at layer 3.
-
The background overlay is set at layer 2 so that it's between DARA and BOYFRIEND.
-
To make DARA fade out, the overlay needs to be set at an opacity of 0 at the beginning of the scene, then I will change the overlay's opacity to 1
EXT. SEINE RIVER - NIGHT
@cut to zone 3
@DARA moves to layer 1 and BOYFRIEND moves to layer 3
@overlay RIVER_ZONE_3 create
@overlay RIVER_ZONE_3 to layer 2
@overlay RIVER_ZONE_3 opacity 0 in 0
@overlay RIVER_ZONE_3 opacity 1 in 2

Fading IN Characters
-
DARA is placed at layer 1 and BOYFRIEND is placed at layer 3.
-
The background overlay is set at layer 2 so that it's between DARA and BOYFRIEND.
-
To make DARA fade in, the overlay needs to be set at an opacity of 1 at the beginning of the scene, then I will change the overlay's opacity to 0
EXT. SEINE RIVER - NIGHT
@cut to zone 3
@BOYFRIEND moves to layer 3
@overlay RIVER_ZONE_3 create
@overlay RIVER_ZONE_3 to layer 2
@overlay RIVER_ZONE_3 opacity 1 in 0
&DARA walks to spot 1.28 100 20 in 2 and DARA moves to layer 1
@overlay RIVER_ZONE_3 opacity 0 in 2

